
//www.youtube.com/embed/vu-T86z_y7Q
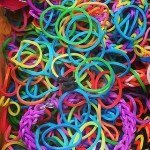
Loom bracelets have been a firm favourite with kids for years — looping brightly coloured rubber bands together to make bracelets, rings and even little charms. The good news? You don’t need to buy a loom kit to get started. If you want to make loom bracelets without a loom, here are 6 designs you can try using just your fingers, a fork, or a couple of pencils.

If you haven’t come across loom bracelets before, they’re made by looping small coloured rubber bands together and securing the ends with S-clips or C-clips. While plastic loom boards are popular, the same bracelets can be made by hand — on your fingers, on pencils or markers, or even on a couple of forks taped together.
When our own kids got the loom bracelet bug, we decided to just start with a bag of bands and clips and see what we could make without buying the loom board — and it turns out you can make some brilliant designs with nothing more than your hands and a bit of patience.
Here are 6 loom bracelet designs to try, each with a video tutorial to follow along with.
1. Single Loop Loom Bracelet
This is the easiest bracelet to make and a great one to start with. There are a couple of ways to make it, so try both methods below and see which one suits you (or your child) best. We found using a finger to hold the bands the easiest approach.
A. Single Loop Bracelet – threading through
(With thanks to The Parenting Channel)
B. Single Loop Bracelet – using fingers
(By Britney Campos)
<!–nextpage–>
2. Fishtail Loom Bracelet
This was the second bracelet we tried. Again, we found it easiest to make on the fingers, but it can also be made using markers or pens instead, which might suit smaller hands better.
(With thanks to braceletmkr5)
<!–nextpage–>
3. Triple Single Loom Bracelet
This one is a little trickier but can still be made using just your fingers. The video below shows how to make it using two forks taped together, which some kids find easier to manage.
(With thanks to Beccajill’s Rainbow Loom)
<!–nextpage–>
4. Starburst Loom Bracelet
As with the triple single bracelet, the starburst design is easiest made by taping two forks together. If you don’t have a crochet hook to hand, a rubber-tipped tweezers or simply your fingers will do the job.
(With thanks to OLGACRAFTS)
<!–nextpage–>
5. Hexafish Loom Bracelet
This one is probably easiest made using forks, but it can also be made with fingers if you’d prefer to skip the cutlery drawer.
(With thanks to OLGACRAFTS)
<!–nextpage–>
6. Dragon Scale Loom Bracelet
This design can be made using fingers or a fork. The video below shows how to make it using a fork.
(With thanks to Cheryl Mayberry)
Frequently Asked Questions
Do I really need a loom board to make these bracelets?
No. All 6 designs above can be made without a loom board — most work well on your fingers, and a few are easier using two forks taped together or a couple of pencils.
What age are loom bracelets suitable for?
Loom bracelets suit a wide age range, though younger children may need help holding the bands steady. Fork or pencil methods can be easier for smaller hands than looping directly on fingers.
Which design should I try first?
Start with the single loop bracelet — it’s the simplest and a good way to get used to handling the bands and clips before moving on to trickier patterns like the starburst or hexafish.
What do I need besides the bands?
Just a bag of loom bands and S-clips or C-clips. Depending on the design, you may also want a fork, a couple of pencils, or a crochet hook (a rubber-tipped tweezers works as a substitute).
Loved This? Keep Exploring
- Fun Rainy Day Crafts for Kids
- Easy DIY Friendship Bracelets to Make at Home
- Screen-Free Activity Ideas for the School Holidays
Have you made loom bracelets in your house? Share your tips in the comments below.
Enjoyed this? Browse more craft ideas on MyKidsTime and save your favourites for a rainy afternoon.
Want more ideas like this delivered to your inbox? Sign up for our free weekly newsletter for craft ideas, activities and family days out, and find us on Facebook, Twitter, Instagram and Pinterest.
Photo credit: chris__reed via photopin (cc)