Marbled eggs are so much fun to make, and they look gorgeous hanging up around the house or garden in springtime. We’ve teamed up with Schoolbooks.ie to show you how to create your own marbled eggs for Easter. Have fun!
Easter is the perfect time to crack open the arts and crafts supplies and get creative. Why not jazz up your egg hunt by hanging some of these pretty marbled eggs around the house and garden? You could even hide them instead of traditional chocolate eggs, and once the kids have collected them, swap them for the real thing.
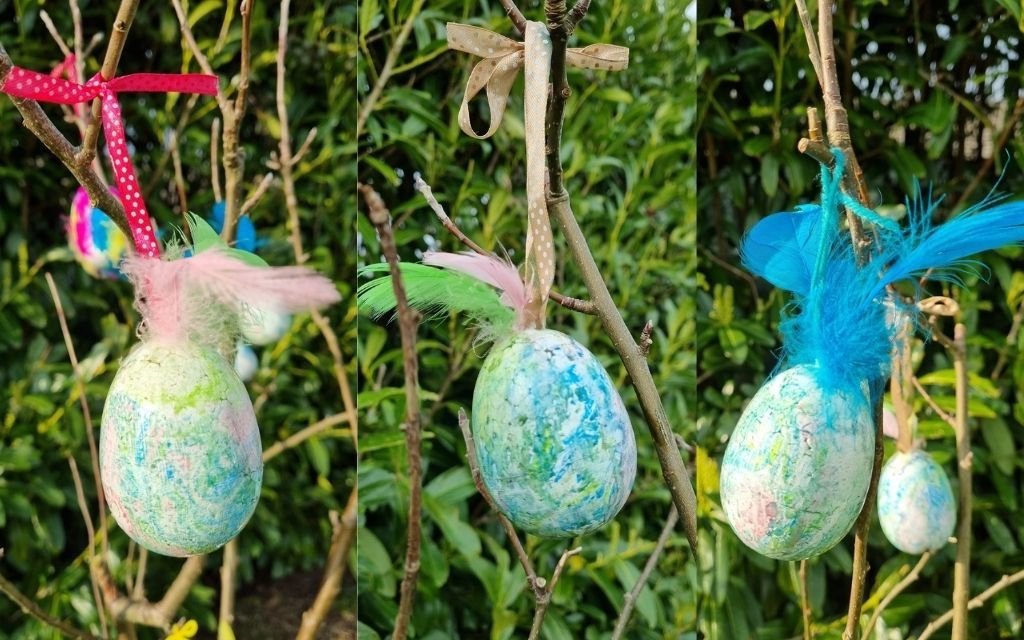
Create Your Own Marbled Eggs
What You Will Need

- Polystyrene eggs
- Marbling inks
- Feathers
- Ribbon or string
- PVA glue
- Apron
- Tray
- A cocktail stick or wooden skewer
- Tablecloth or old newspapers to protect your table (marbling inks can stain!)
You can find all of these and plenty more crafting materials online at Schoolbooks.ie.
How to:
1. Pour some water into a tray.

2. Add drops of the marbling inks. Swish the inks with a skewer or spoon.

3. Place a polystyrene egg on a skewer, then dip and swirl it in the water.

4. Experiment with different colour combinations.

5. Leave your egg on the skewer to dry by standing it in a cup, or securing it in some blue tack or play-doh. Leave it near a window during the day, or by a radiator overnight.

6. Make a small hole at the top of the egg. Using a small paintbrush, put some PVA glue into the hole, then use the skewer to push the tied string, wool or ribbon through it.
For a bit of extra colour and fun, why not add some feathers too? Brush over the hole again with PVA glue and leave to dry.

Are your kids going to have a go at creating these pretty marbled eggs? Leave a comment below and let us know — we’d love to hear from you!

Frequently Asked Questions
Can I use real eggs instead of polystyrene eggs?
This craft is designed for polystyrene eggs, which are reusable and safe for younger children to handle. Polystyrene eggs also mean you can hang your finished creations up as decorations without worrying about them going off.
How long does it take for the marbled eggs to dry?
Drying time depends on the room and the amount of ink used. Leaving the egg near a window during the day or by a radiator overnight usually works well, but always check it’s fully dry before handling further.
Do marbling inks stain?
Yes, marbling inks can stain surfaces, hands and clothing, so it’s worth covering your table with a tablecloth or old newspaper and popping an apron on before you start.
What age group is this craft suitable for?
Younger children may need a hand with the dipping and swirling step and with using the skewer, but most of the craft is hands-on and enjoyable for a wide range of ages with a little supervision.
Related Articles
- Easter Egg Hunt Ideas for the Whole Family
- Fun Easter Crafts to Try at Home
- Easy Easter Baking Ideas for Kids
Save This Idea for Later
Loved this craft? Browse more of our Easter activities and craft ideas to keep the fun going all season long.
Get More Craft Ideas Every Week
Want more easy, fun activities like this delivered straight to your inbox? Sign up to the MyKidsTime newsletter for weekly ideas, crafts and family inspiration.