Looking for a fun paper craft the kids can make in an afternoon? This funky pen holder is made using a clever origami-style folding technique, and it’s a great way to turn a few sheets of coloured paper into something genuinely useful for the pencil case or the desk. It’s suitable for kids and teens aged 4 and up, and younger children will just need a bit of help with the folding.
Watch the video below to see exactly how it’s done, then follow the step-by-step instructions underneath to make your own.
What You’ll Need
- 6 sheets of A4 coloured paper (using different colours works best)
- A small piece of cardboard for the base
- Ruler
- Pencil
- Glue (craft glue with a paint brush is easiest to work with)
- Scissors
Preparing Your Paper
Each sheet of paper needs to be trimmed into an approximate 21cm square. To do this, simply fold the page into a triangle shape until the edges meet, then trim off the extra strip at the end. Don’t throw away these off-cuts — trim them down to 10cm wide x 5cm high, as you’ll need one per sheet later on.
Method
Fold firmly so that clear crease lines are visible on each sheet of paper — this makes the later folds much easier. Watch the video alongside these steps for the clearest guide:
1. Fold each sheet of paper into a large triangle so the edges meet, leaving a small piece at the bottom.
2. Fold back the extra bit at the bottom and remove it (keep it — you’ll need it in a moment).
3. You should now have 6 squares of coloured paper (approx 21cm) and 6 off-cuts.
4. Cut the off-cuts into 10cm wide x 5cm high pieces. You’ll need 6 in total.
5. Take your first square of paper and fold it in half.
6. Open it out, turn the page 90º, and fold it in half again.
7. Open it out, then fold each half into a quarter so the edges meet in the middle of your square.
8. Open the page out again, turn it 90º, and fold each half into a quarter so the edges meet in the middle.
9. Open the page out and fold each corner into a small triangle, so each one just meets the first set of crease lines.
10. Keeping the edges folded, turn the page around and fold each side into a quarter so they meet in the middle.
11. Turn the paper around lengthways and fold it in half away from you, so you’re left with a smaller square.
12. Turn the paper around again and fold each half back on itself to form a small rectangle.
13. Open it out and turn it over, so all the folds sit on the underside.
14. Fold back the edges so you have a square again, with the folds visible on top.
15. Take one of the small off-cuts and slot it into the folded triangle on one side of your paper.
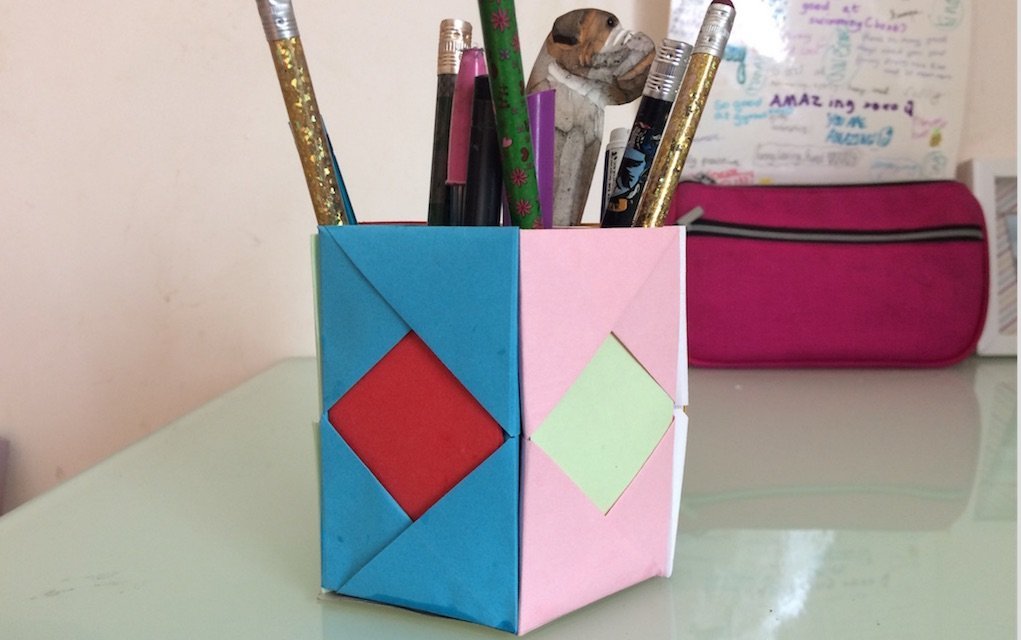
16. Carefully feed it into the triangle on the other side, forming a 3D triangular shape with a diamond pattern on the front.
17. Repeat all the steps with the remaining 5 sheets.
18. Carefully glue the triangular shapes together side by side, making sure the diamond pattern faces forward on each one.
19. This forms the body of your pen holder.
20. Trace around the base of your pen holder onto the piece of cardboard.
21. Cut out the cardboard shape and glue it carefully to the base — this keeps everything sturdy and stops your pens or pencils from falling through.
And that’s it — a colourful, funky pen holder made entirely from paper!
Frequently Asked Questions
What age is this craft suitable for?
This craft works well for kids and teens aged 4 and up. Younger children may need help with the more detailed folds, so it’s a lovely one to do together.
How long does it take to make?
Once you’ve got the hang of the folds, it only takes a short amount of time to make one pen holder — it’s a great rainy-day or after-school activity.
Can I use any type of paper?
Ordinary A4 coloured paper works well for this craft. Using six different colours gives the finished pen holder its fun, patchwork look, but you can also stick to one or two colours for a more uniform finish.
Do I need any special tools?
No — just paper, scissors, a ruler, pencil, glue, and a small piece of cardboard for the base. No special crafting equipment is needed.
What if my folds don’t line up perfectly?
Don’t worry — folding firmly along each crease line makes a big difference, and small imperfections won’t affect the finished pen holder. Watching the video alongside the written steps helps a lot too.
You May Also Enjoy These Fun Projects
- 15 Easy Paper Flowers Crafts
- Stunning But Easy Paper Crafts
- Funky Crafts for Kids and Teens
- 10 Simple Animal Themed Crafts
- 10 Popsicle Stick Crafts
- 8 Creative Toilet Paper Roll Crafts
- 15 Easy Pipe Cleaner Crafts
- 11 Easy Craft Ideas that are Perfect for Parties
Get More Craft Ideas Every Week
Want more easy, budget-friendly craft ideas delivered straight to your inbox? Sign up for our free newsletter for fun activities, competitions and offers — perfect for keeping the kids entertained all year round.
Have you made our funky paper pen holder? We’d love to see how it turned out — let us know in the comments below!